Use Your Own Stovetop Espresso Maker And Save Money
20th May 2015
Coffee shop drinks are expensive. You want to save money but can’t afford an expensive espresso machine. Not a problem! Making your own espresso with a stovetop espresso machine is easy. Just follow our our stovetop espresso maker instructions and will save lots of money!
What is Espresso?
Espresso is both a coffee beverage and a brewing method. It is not a specific bean, bean blend, or roast level. Any bean or roasting level can be used to produce authentic espresso.
Espresso is coffee brewed by forcing a small amount of nearly boiling water under pressure through finely ground coffee beans. Espresso has more caffeine per unit volume than most coffee beverages, but because the usual serving size is much smaller, the total caffeine content is less.
Stovetop Espresso Makers
The Moka pot is a stovetop espresso maker that produces espresso by passing boiling water pressurized by steam through finely ground coffee.
Traditionally, Moka pots are made of aluminium and are used over a flame or electric range. The aluminium moka pots cannot be used on induction stoves.
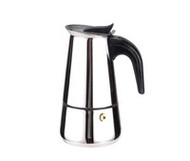
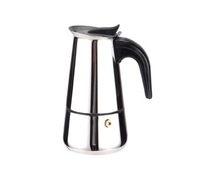
Our espresso pots are available in a traditional aluminum Moka pot design or a modern stainless steel design. Both espresso pots work the same way and will brew a tasty espresso drink.
The Perfect Espresso Grind
Having the right espresso grind is the first step to making an authentic cup of espresso.
Espresso grind coffee is much finer than regular brew coffee. The powder-like, slightly gritty, grind provides the proper resistance to the water being forced through it.
One small espresso requires about ½ tablespoon (7 to 9 grams) of ground coffee beans per 4 tablespoons (2 ounces) of water. This produces a 1.5 oz. shot of dark coffee concentrate.
How to Grind Your Beans
Using a burr grinder: Place the beans in the grinder. Select a fine or superfine grind size. The machine will grind your coffee beans and stop automatically.
Using a blade grinder: Place the beans in the grinder. Grind the beans in short bursts of 2 or 3 seconds. Stop when the beans have been ground for at least twenty seconds total. The exact amount of time it takes to grind depends on the grinder model and blade sharpness.
To test your grind, pick up a pinch of grounds between your thumb and finger. If it's ready, it should clump together on your fingertip, not fall off in separate particles. If you find there is sediment in your brew, choose a slightly coarser grind, but still finer than you would use for a filter coffee machine.
Understanding How an Espresso Maker Works
There is a bottom container that you fill with clean, cold water, a perforated basket that holds the coffee grounds with a tube that extends down almost to the bottom of the lower container with the water. The top half has a perforated screen in its bottom.
When this top half is screwed onto the bottom half, the perforated screen keeps the coffee grind in place during the pressure brewing process.
A rubber gasket forms a tight seal between the top and bottom halves of the unit. There is a pressure relief valve in the bottom half as a safety device that releases the steam pressure if it becomes excessive due to any kind of blockage for the hot water to travel up through the coffee grounds.
Placing the prepared/filled unit on the stove for a heat source heats the water to the boiling point. This forces the hot water up through the coffee grounds under steam pressure and fills the top container with finished coffee. Once all the water in the bottom half has been forced through the grounds, the coffee is finished and the unit must be taken off the heat.
How to Use A Stovetop Espresso Maker Step-by-Step Instructions
- Fill the bottom of your pot with cold water. If your pot doesn’t have a fill line, be sure not to go past the steam valve.
- Put the coffee basket in the pot, and fill it evenly with the beans until it’s about three-quarters full. Don’t tamp the beans down. The coffee will expand once it starts getting damp, so you’ll want to pack it loosely since it will need some room to spread out.
- Screw the top of the pot on tightly. Make sure it’s extra tight.
- Put the pot on the stove on medium heat. You don’t want to put the heat on high, because if the coffee boils it will taste bitter.
- Remove the pot from the stove once you hear the espresso sputtering into the top of the pot.
- Your espresso is ready!
Tip: If your Espresso maker is new, the first pot of coffee you brew in this should be thrown away. The purpose of this throw away pot is to clean the machine out before using it for the first time and to make sure the pressure relief valve is working ok.


